You have no items in your shopping cart.
Painted with Gundam markers! how to use it and what the point is!
Friday, March 27, 2020 10:55:26 AM Asia/Tokyo
Have you used "Gundam Marker" ? very convenient touch up for small tips part. It makes your model more real.
By assembling the molded parts and applying the included stickers, you can almost recreate the colors from the play, which is one of the attractions of this Gundam model kit.
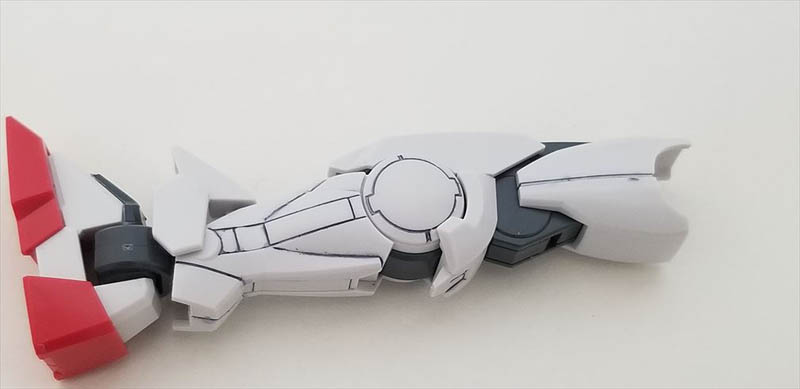
It looks cool as is, but by adding a little bit of care to the details such as weapons, joints, and molds (grooves), it can be made into a cool and realistic Gundam model kit.
In this article, I will introduce the points and tips about how to paint using "Gundam Marker", which can be easily and beautifully done even by painting beginners, with photos of the actual painting.

1.Upgrade your Gunpla! Let's talk about partial painting!
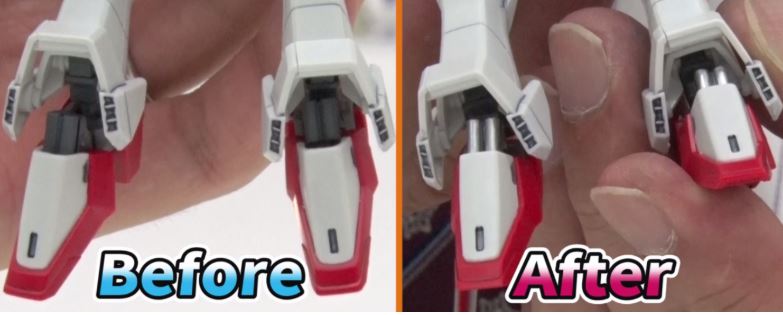
Partial painting is the process of painting detailed parts, such as weapons and joints, that are not completely color-coded, into realistic colors. The parts, such as weapons and joints, are basically a single gray color. This is because they are often grouped together in a single, monochromatic runner. Even though it is still gray, the joints and other parts are not so noticeable once they are assembled.
For example, the cylinder part of the ankle. Although the parts are often hidden, painting them in gold and silver gives them a mechanic look and a more realistic atmosphere than if they were only gray. In other words, just by adding a little color coding, you can easily increase the number of Gundam models to one rack.
For partial painting, a pen-type paint called "Gundam Marker" is recommended. It can be used in the same way as a pen, so it is easy to handle and can be used for partial painting.

******************************************************************************************************************************
2.How to use Gundam Markers
Step 1: Shake the pen about 50 times with the lid tightly closed.
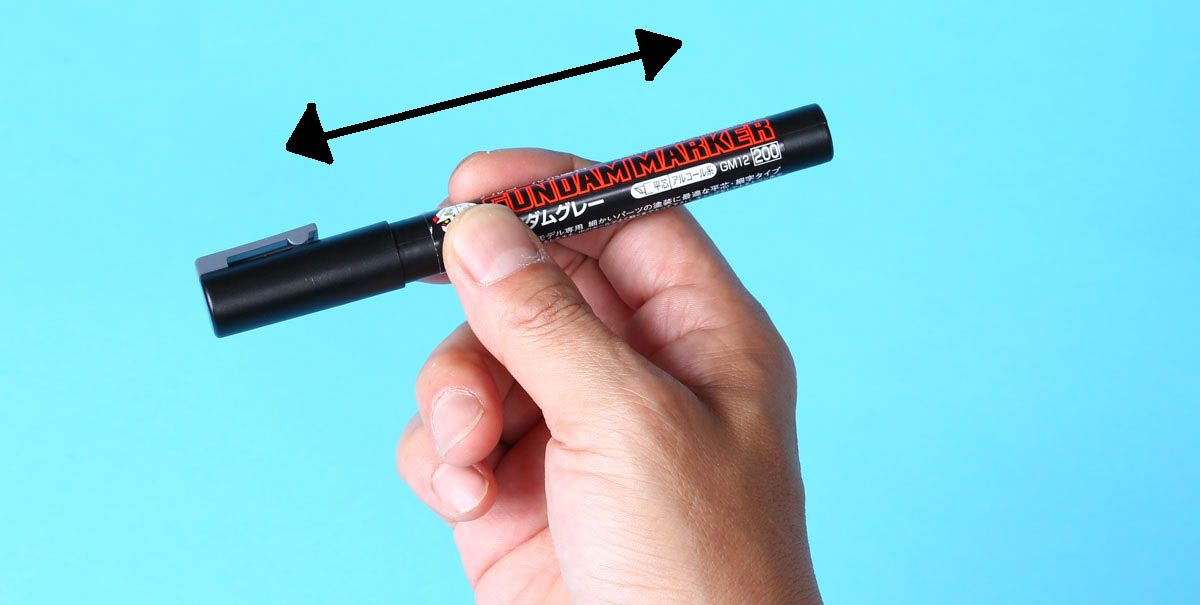
When using a Gundam marker, make sure that the lid is tightly closed and shake it about 50 times before using it. This is because in some cases the paint inside may have separated when unused or not used for a while. If you use the product without shaking and stirring it thoroughly, only the supernatant liquid will appear when you start using it, and the color will not be painted properly.
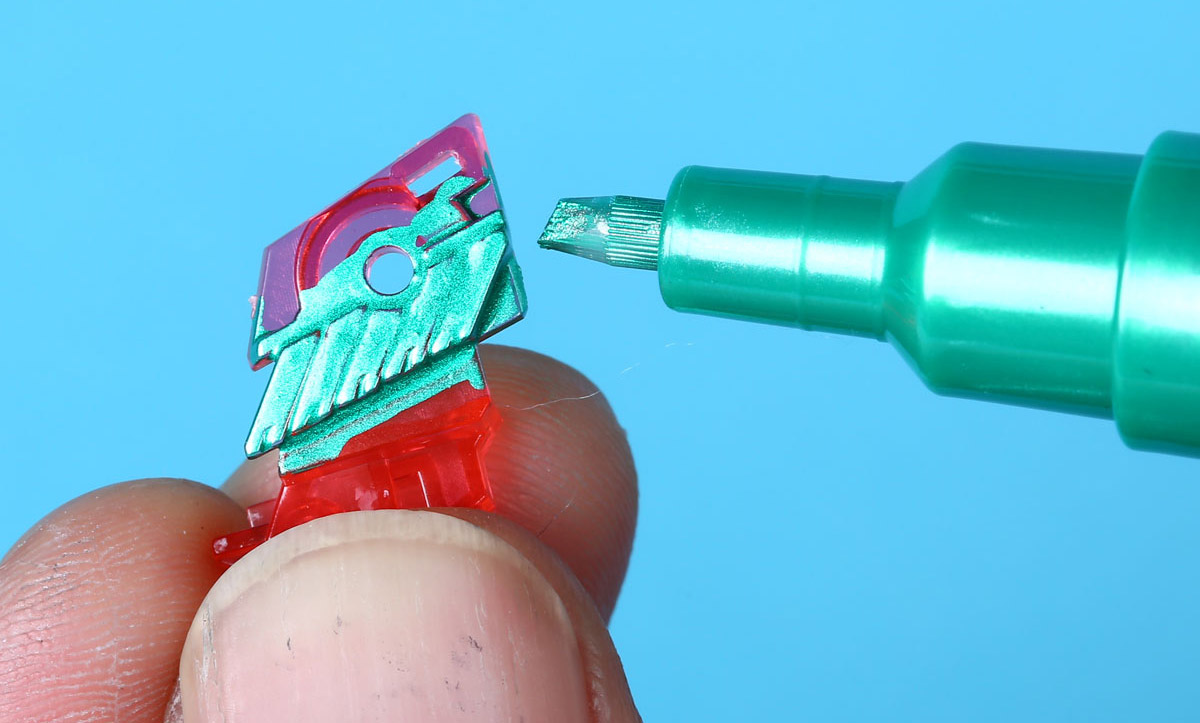
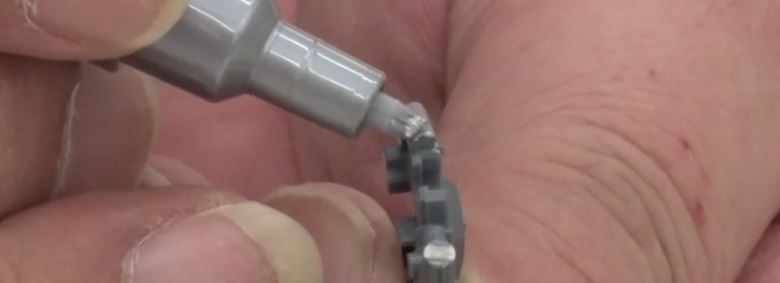
Step 2: Let some of the paint out before starting to use it
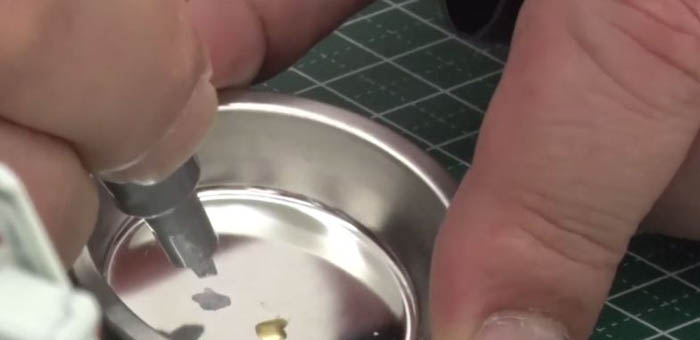
If you try to apply the part immediately after shaking it firmly, the color may not come out well. Therefore, the trick to painting well is not to start painting immediately after shaking, but to let a little paint out in a paint dish or the like before starting to use it. The nibs of the Gundam markers are cut at a slight angle. Prepare a paint dish and press it into the dish to match the angle of the nib. You don't have to use a special paint dish, but you can substitute an unfolded milk carton or aluminum foil. If the paint comes out, stop pushing it and it's okay.
******************************************************************************************************************************
Let's actually use it !!
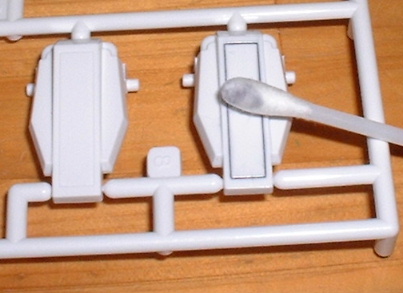
What kind of preparation should I do before painting?
First, look at your runners and make a plan for where to paint them. In this section, we will discuss the cylinder part of the internal mechanism.
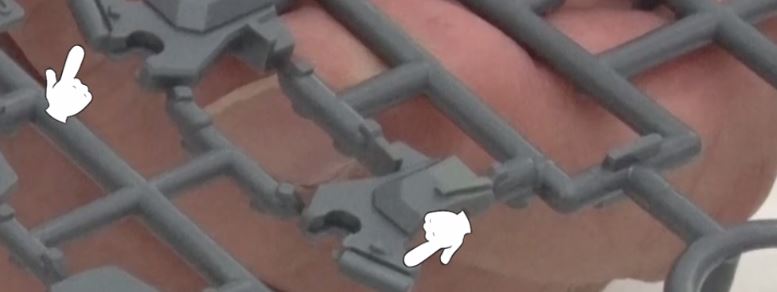
When the parts are small, it is difficult to hold and apply by hand, and the cylinder part is said to be especially difficult to apply. When painting smaller parts, such as cylinders, it's a good idea to cut off the runner at the edge that surrounds the part and use it as a handle. The runner can be easily cut with nippers or other tools.
What are the key points when painting?
Finish the whole thing before the paint dries.
Paint from the tip of the part using the nib
******************************************************************************************************************************
Paneling techniques using Gundam markers
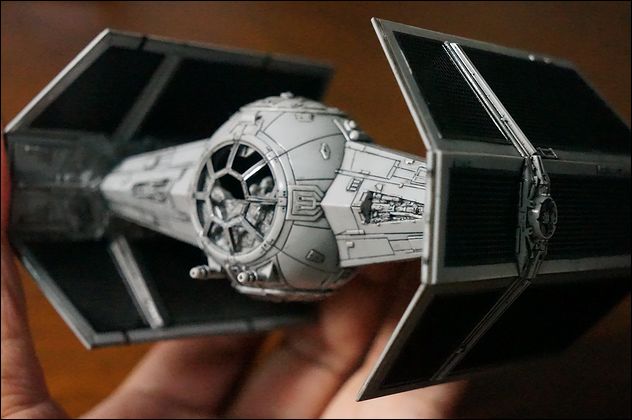
Paneling is a technique to draw lines and express shadows on the grooves, depressions, and molds of parts with "Gundam markers". By paneling, you can create a "shadow" or "three-dimensional" effect.
I'm sure you've seen it in the Star Wars mechs.
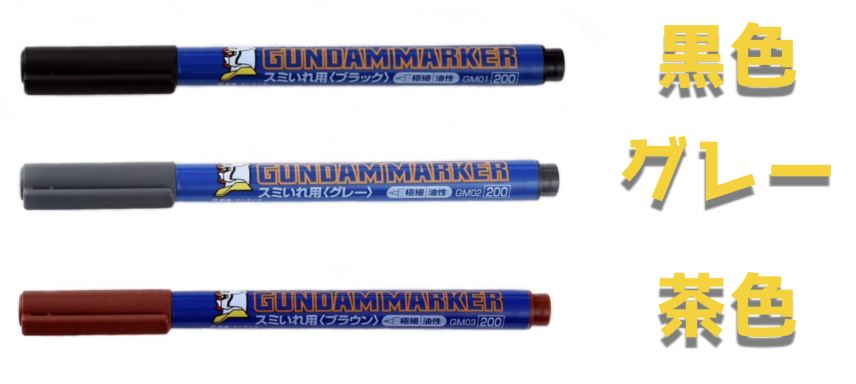
There are 3 different types and 3 different colors of Paneling marker.
TYPE
Fine Tip....basic type. you can paint strong panel line.
EXTRA THIN TYPE...use for painting broadly then wipe off, so You can't use it on areas where you're going to apply more paint.
MECHANICAL PENCIL...It's for pretty fine grooves.

COLOR
Black: Recommended for dark colored parts
Gray: Recommended for white parts
Brown: Recommended for red and yellow parts
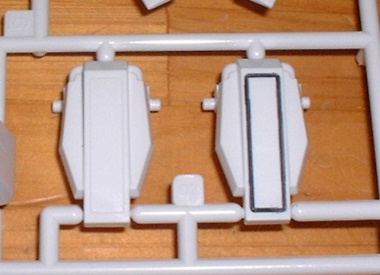
When smearing for the first time, it is difficult to know which groove or mold to smear into. It means. So, you can refer to the "completed photo" on the instruction manual or the box of the Gundam model kits.
Let's trace the grooves in the parts and write!
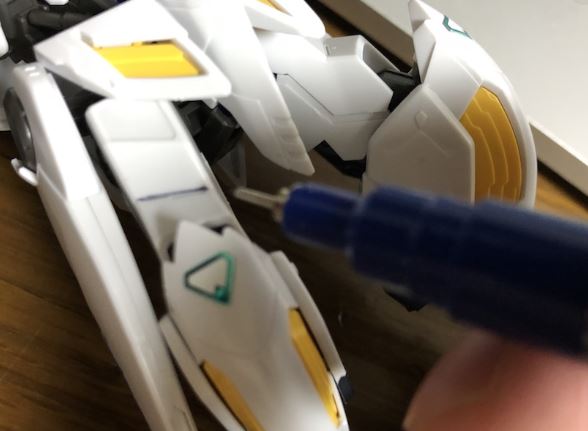
If the smear fails, it can be fixed by remoover pen or tissue paper with alcohol. Also, I recommend cotton swabs.
Come on, give it a go!
Posted in News
By